In the previous chapter we introduced you to Facebook advertising costs, average ROI, and how to set a goal and measure KPIs for your ad campaigns.
Chapter 3 is all about getting you set up and running your first campaign!
First, you have to set up your Facebook pixel on your website. The Facebook pixel is a snippet of code you put on your website pages to track activity on those pages. It captures information on your visitors, such as whether they bought, what pages they visited, and more.
After we set that up, we’ll talk about the best Facebook ad objectives and formats to hit your goals, explain how Facebook’s bidding system works (and how to get the most out of it), and finally how to keep your Facebook campaign organized as you build more and more ads.
Let’s dive in!


What Is A Facebook Pixel?
As we explained above, your Facebook pixel is a snippet of code that tracks your visitors.
It works by sending data back to Facebook from your website by tracking the pages they visit and the links they click. It can also track events, such as whenever a visitor adds an item to their cart, makes a purchase, or abandons their cart, to name a few.
→ Click Here to Launch Your Online Business with Shopify
According to Facebook, the Facebook Pixel the Facebook Pixel enables you to evaluate the effectiveness of your ad campaigns by understanding the actions visitors perform on your site.
Once the Facebook pixel code has run on your site for at least 24 hours, you’ll be able to retarget those visitors in remarketing campaigns, as well as create lookalike audiences. Your pixel is the key to getting the best possible ROI from Facebook ads, so make sure you install it ASAP!
How to Set Up Your Facebook Pixel
In order to set up your Facebook pixel, you first need to create an ads manager account, which we explain how to do in the next section. So do that if you haven’t already.
Next, select ‘Pixels’ under the events manager in your Ads Manager menu.
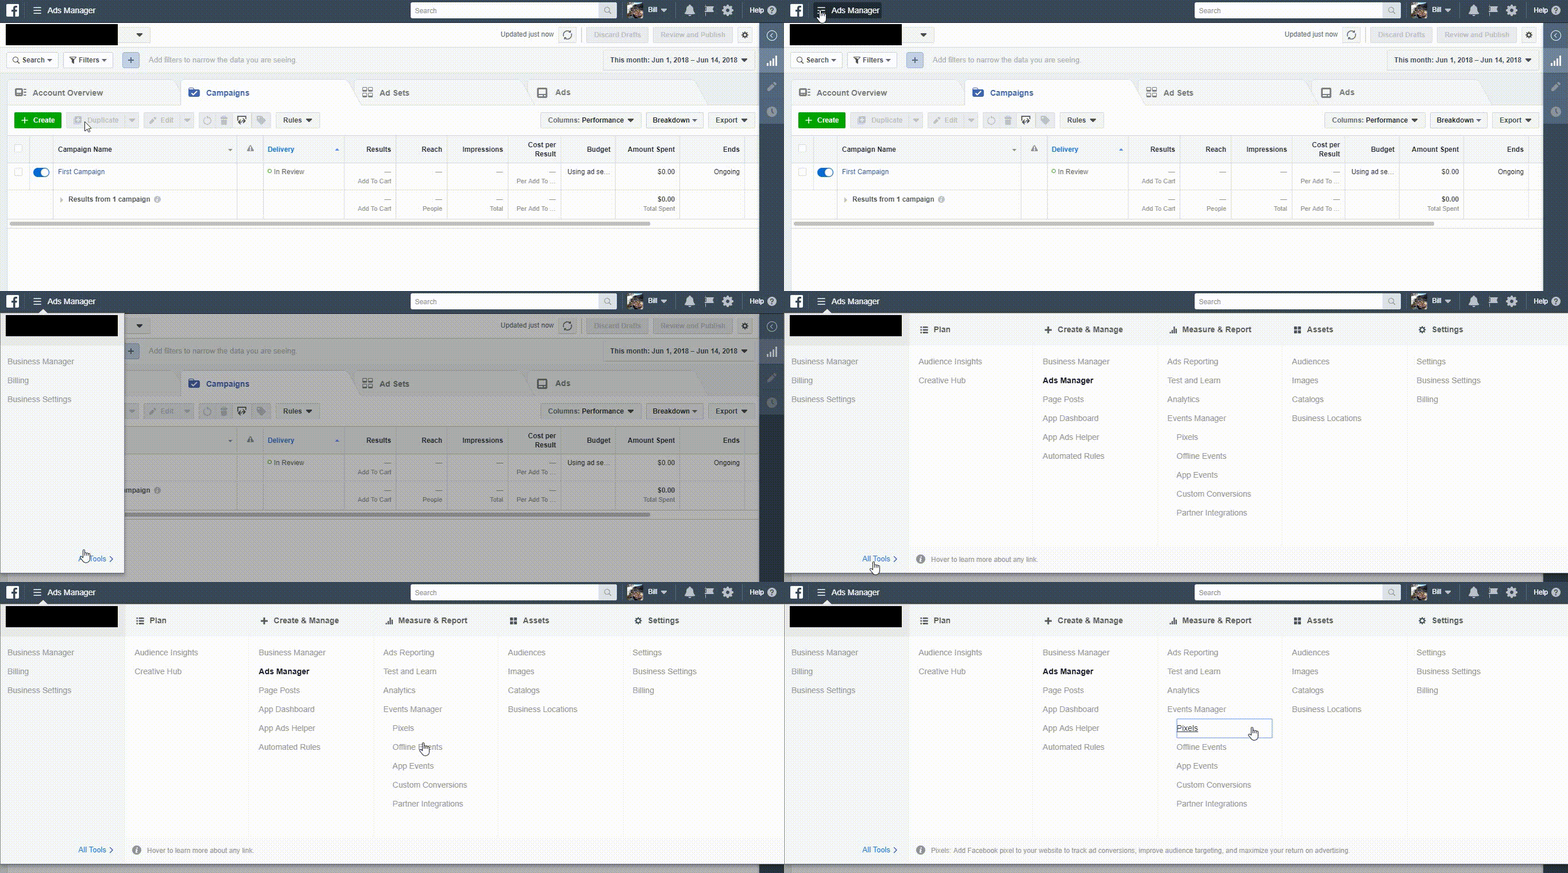
Finally, click ‘create pixel’. Name it whatever you want (mine’s just named after my website) and proceed to download the code.
From here, you have multiple options to set it up on your site.
- Do it manually by embedding the code in the <head> tag on every page you want to track.
- Use Facebook’s WordPress plugin to install it automatically.
- Have your developer install it for you.
Luckily, if you’re using Shopify, it’s as simple as adding the Pixel ID – the ID, not the full code – to your settings.

And that’s all there is to it!
To check if your pixel is working properly, either use the Facebook tag manager or send test traffic to your site (Facebook can do this if you just press the ‘send test traffic’ button on the pixel settings page) and check the pixel analytics to see if it tracked the traffic or not.
Pro tip: You can also install different pixels for each product you offer. This is a more advanced tactic, so it’s not recommended for beginners. But it can help you optimize your ads for each individual product separately, which is perfect for scaling.
Once you’ve allowed the pixel to run, you can see how it’s performing and check out the demographics of your site visitors (and what pages they visited and actions they took) by visiting the Analytics report in your Ads Manager. We’ll explain more about how to navigate the various reports and menus of the Ads Manager in an upcoming section.
How to Use Facebook Ads Manager
The Facebook Ads Manager is where you create, organize, and track all your Facebook ads. Without an Ads Manager account, you won’t be able to create Facebook ads.
Note: There used to be a tool for editing Facebook ads called the ‘Facebook Power Editor’. This tool has since been taken down, and its features are now built into the ads manager.
Creating an Ads Manager Account
To create an account, click the arrow in the upper right of your Facebook advertising account and select ‘Create Ads’.
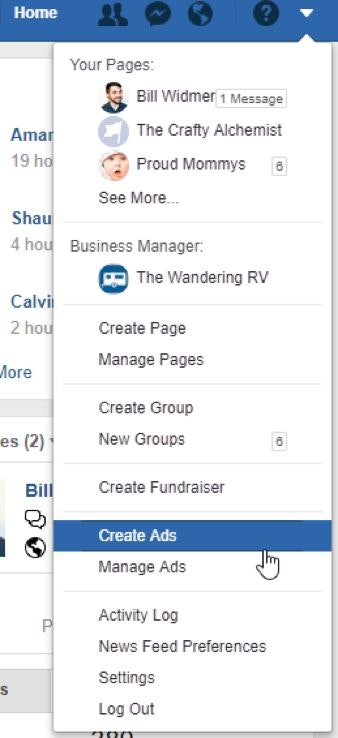
Facebook will generate an account for you and guide you through setting up your first ad campaign. Either go through Facebook’s setup or close it out and go to the menu in the top left to begin using the system.
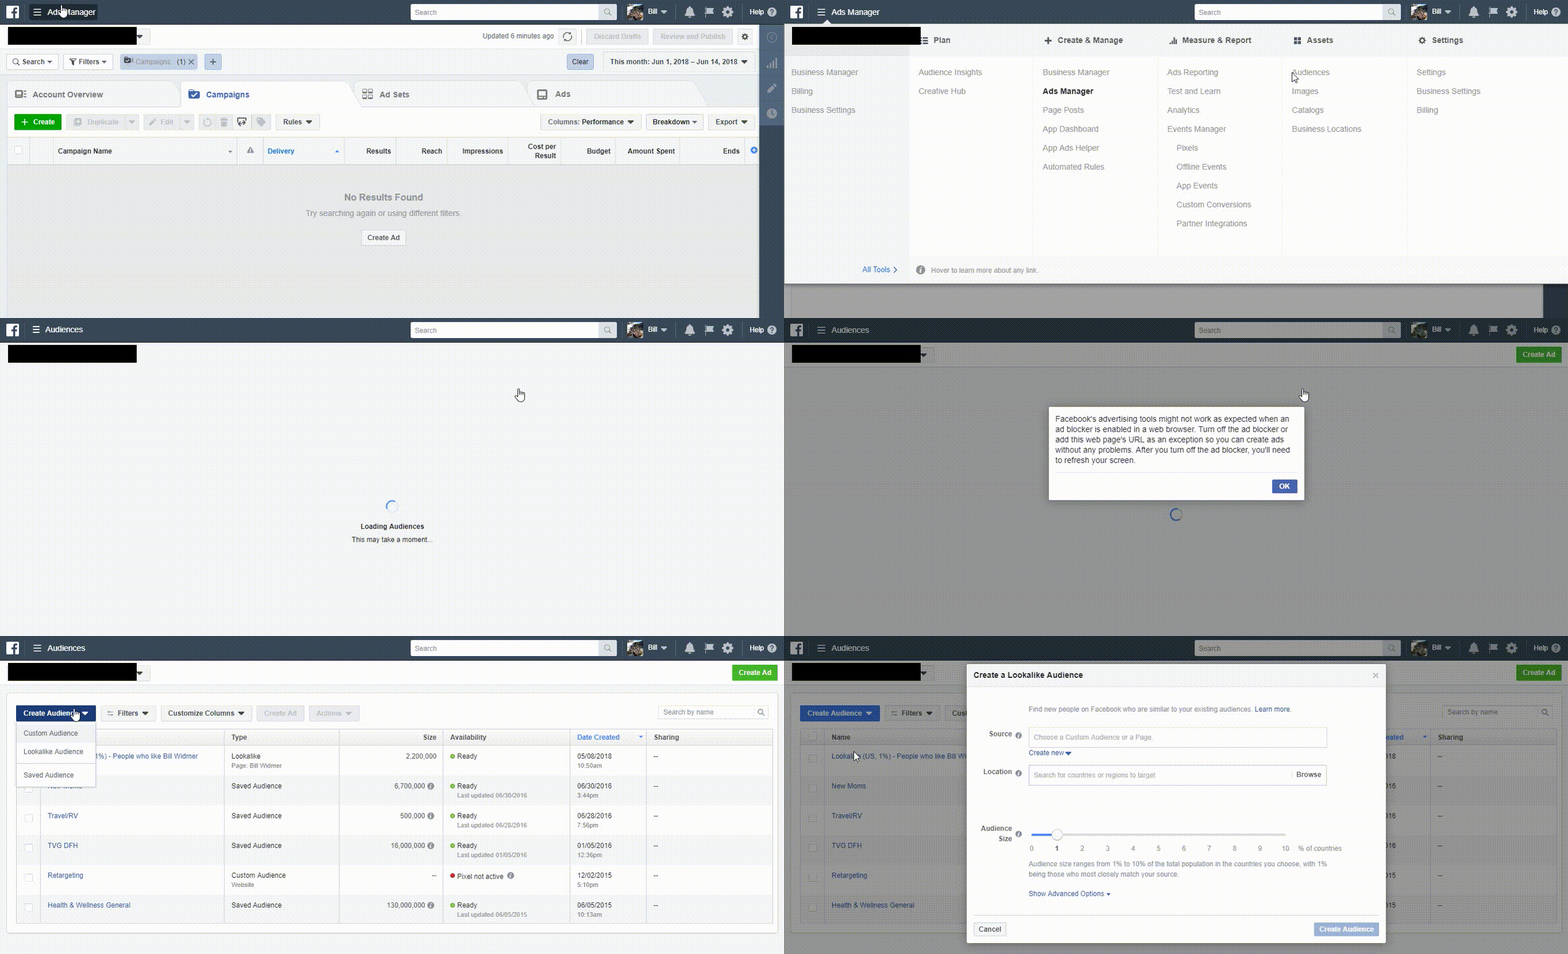
Understanding the Ads Manager Menu
The Ads Manager menu is broken up into five sections:
- Plan
- Create and Manage
- Measure and Report
- Assets
- Settings
Let’s break them down.
Plan
The plan section has tools that help you understand your audience and come up with creative ad ideas.
Audience Insights: The Audience Insights tool shows you detailed analytics on any audience targeting metrics you choose. When you select this tool, Facebook prompts you to choose an Audience to start with.
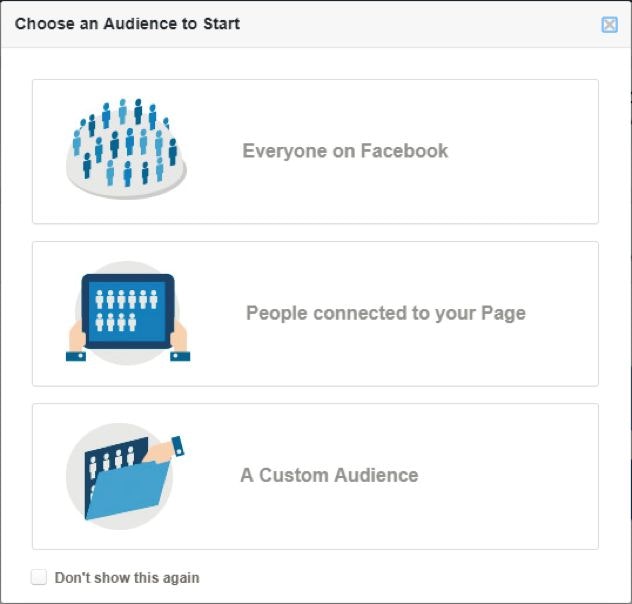
It doesn’t matter which one you choose, as you can select any audience from any selection. The one you choose just affects where Facebook points you to make changes – you don’t have to make these changes if you don’t want to.

These are your options for selecting an audience. For example, if you want to see data on the people who like your page, just select your page under ‘People Connected to’.
If you find that the majority of your audience are men, you can run more masculine ads. Or if they like a particular product, you can offer that product on your store and run ads to it.
You can see everything from their demographics (like age, gender, location, etc.) to their psychographics (likes and dislikes) and even the device they’re using to view Facebook.
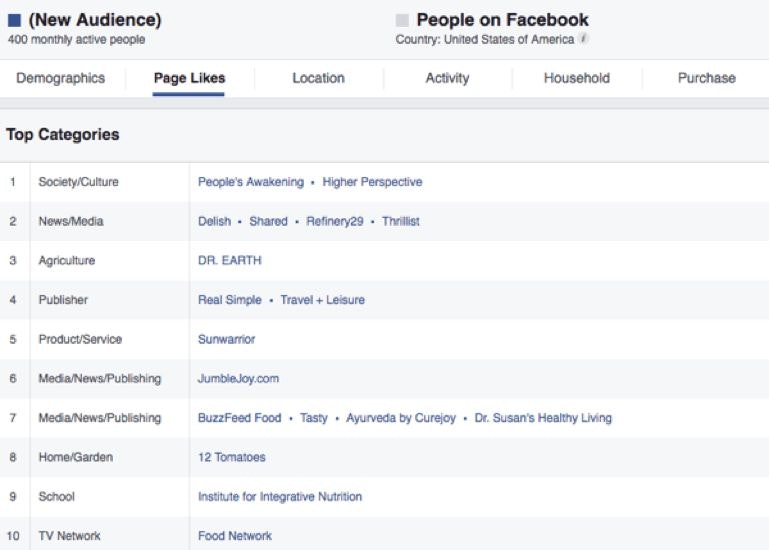
Pro tip: If you look at the ‘Page Likes’ tab, you can see what pages your audience likes. If you notice that a lot of the people who have ‘liked’ your page also tend to ‘like’ another page, you can create ads targeting people who like that other page.
Creative Hub: The Plan section also has a tool called Creative Hub, which allows you to create ad mockups to share with your team.

Create and Manage
The Create and Manage tools are what you’ll use to create and manage your Facebook advertising.
Business Manager: If you have multiple Facebook pages or a team that you work with, the Facebook Business Manager allows you to manage all of them from one account, as well as share access with anyone you see fit.
Ads Manager: This is the tool you use to create and run your ads. It’s where you create your Facebook Pixel, create custom reports, and see data on your ads.
Page Posts: This tool shows you the engagement of your Facebook posts. You can filter to see only page posts, only ads, or any other post type you have. You can see who’s engaging with your posts and how.
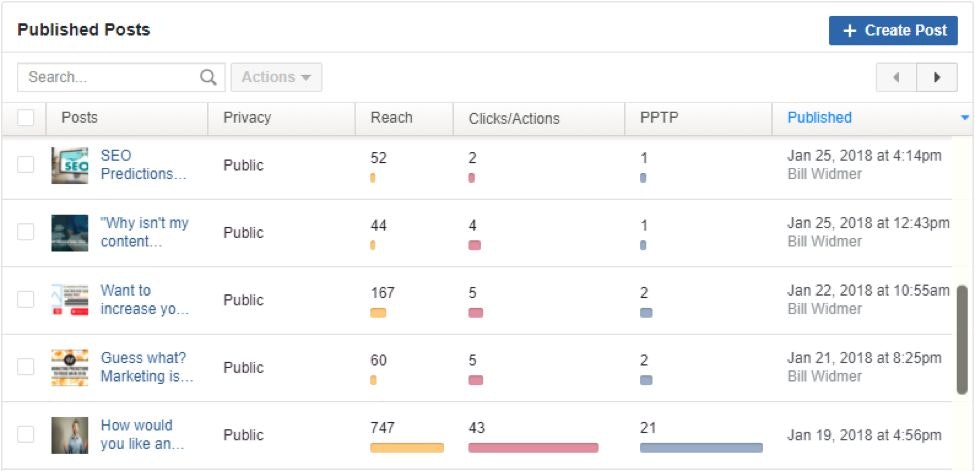
You can use this tool to see which of your posts is more engaging, then create more of that kind of post. In the example above, my video post did much better than my image posts. So I know video resonates well with my audience!
App Ads Helper: App developers can use this tool to drive traffic to apps for more downloads.
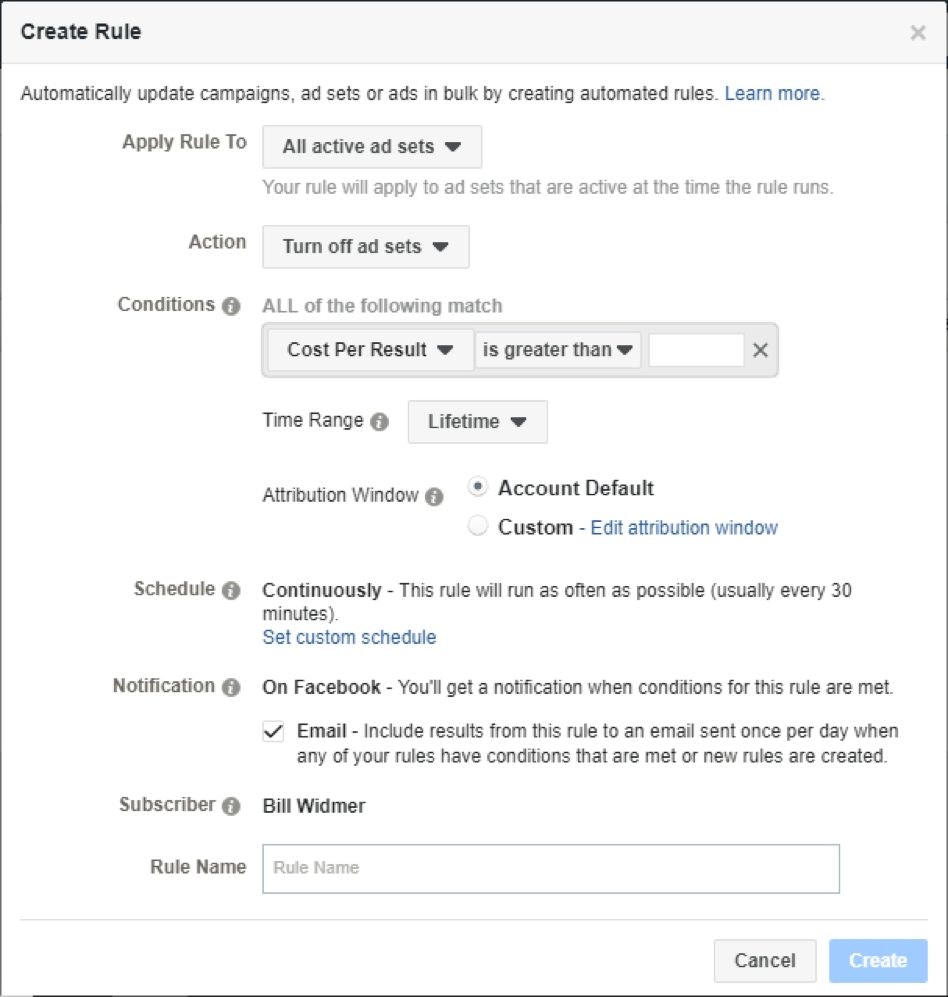
Automated Rules: You can use this tool to set up rules for your ad campaigns. For example, you can limit your daily ad spend or automatically stop ads when their conversion cost goes higher than $10.
Measure and Report
The Measure and Report tools allow you to measure the results of your ads and create custom reports based on your goals. You can use them to track goal conversions and see how well ads are doing.
Ads Reporting: This tool lets you create custom reports on your ads. You can set a date range to see how they performed during certain times. By reviewing your ads, you can see what’s working and what isn’t to create better ads in the future.
Our favorite way to use the ads reporting tool is to compare campaigns to see which performed the best. For example, you can compare your ads to see which had the better click-through rate or the lowest CPA.
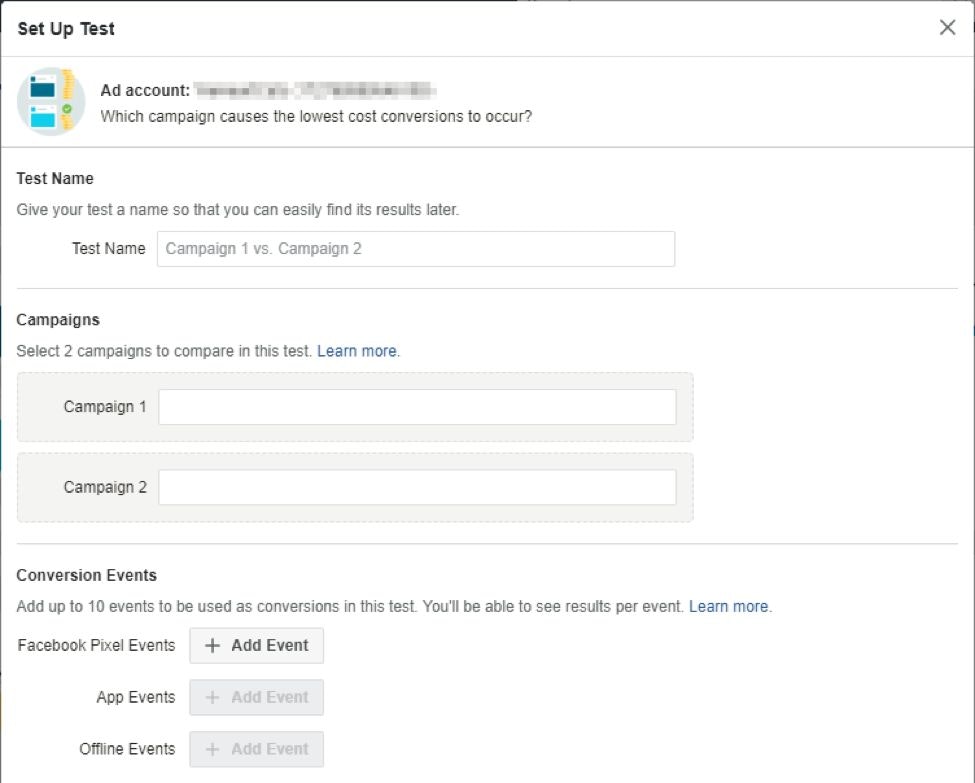
Test and Learn: This tool lets you A/B test your ads to see which variants convert better. You can also compare different ad campaigns and/or Facebook pixel events.
Analytics: Use this tool to analyze your Facebook pixel data. Once you start running ads with an active pixel, this is where you’ll see all the results (such as CPC, CPA, reach, engagement, etc.) from those ads. You’ll be visiting this tab alot.

Custom Conversions: Your Facebook pixel will track standard events on your site, such as what pages are viewed. But with custom conversion pixels, you can define a specific action or set of actions, such as watching a video or clicking on an image to zoom in.
The Custom Conversions tool lets you review that custom conversion pixel data. You can also see previous data on all the custom pixels you’ve created.
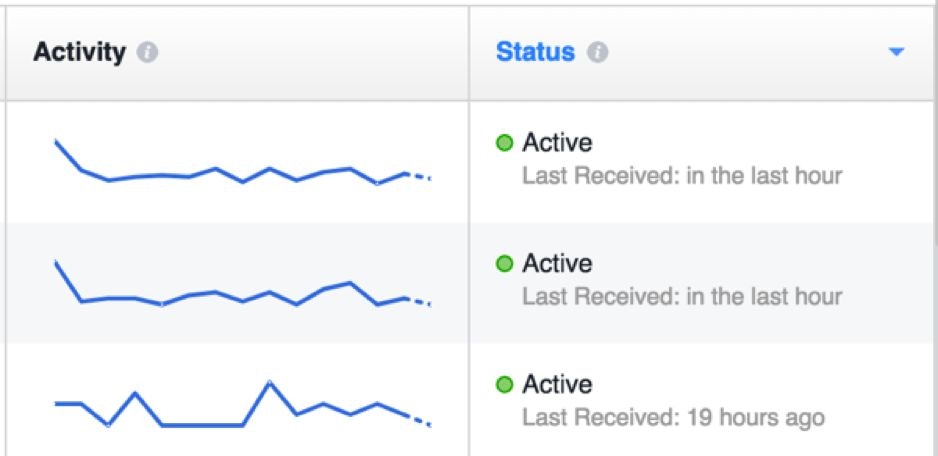
You can have up to 40 conversion pixels per ad account. If you need to create additional pixels, you’ll have to delete old pixels.
To create a custom conversion pixel, click the ‘Create Custom Conversion’ button and fill in the box that pops up.
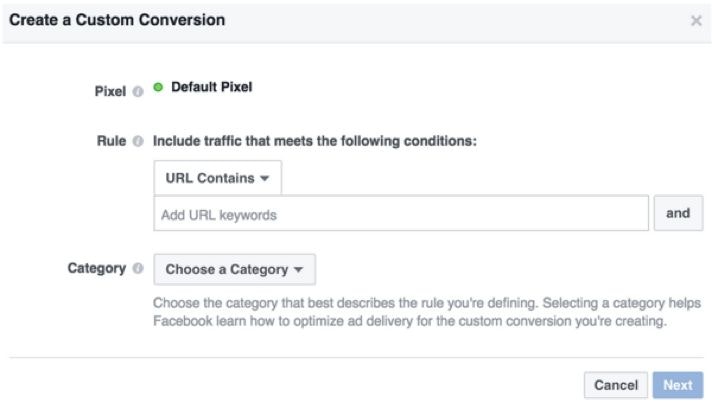
You have to enter a specific URL to track data on. You can also track multiple URLs, if you wanted to target people who have visited more than one page on your site. Once you’ve created the custom pixel, you’ll be able to select that pixel when you create a conversion-focused ad.
For example, you could run an ad that leads to a sign up page. After someone signs up, they’re redirected to a thank-you page. You could put the thank-you page URL in the custom conversion pixel, and any time someone lands on that page, the pixel will track that result.
Note: You should refresh the page that you create the custom pixel on. That way the pixel will fire and you’ll know it’s working. If it doesn’t fire, something is wrong. You can also use Facebook’s tag manager to test the page and see if the pixel was installed properly.
Assets
The Assets section of tools allows you to view your custom audiences, images, product catalogs, and physical business locations.
Audiences: Here you can create custom or lookalike audiences. You can also view and manage all the audiences you’ve saved in the past, and search through them with filters.
Images: This tab lets you view and manage all the images you’ve ever uploaded to or shared on Facebook.
Catalogs: Here you can manage your product catalogs. You can upload a product catalog by going to www.facebook.com/products/catalogs/new and following the instructions. This is important when running certain ad campaign types, such as a product catalog ad.
Business Locations: This tool shows you data on your physical locations, if you have them. By setting up physical locations, you can more easily create local ads to drive foot traffic.
And that’s it for navigating the ads manager! Next up, we’ll talk about the different Facebook ad objectives and which you should use.
Settings
This section is where Facebook stores all the information related to your account. Go here to see the pages linked with your account, update your email, change payment information, and so on.
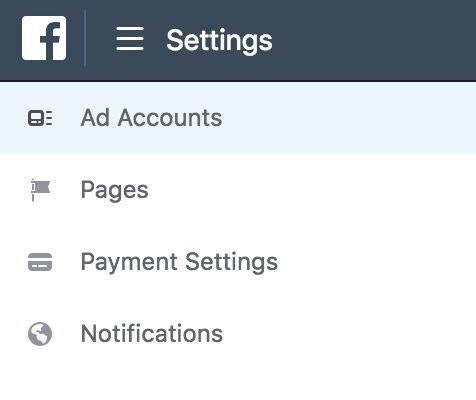
Note: Be sure to add your tax ID number to your settings. This is important for claiming your ad spend on your taxes. (I am not a tax consultant and cannot give you tax advice – please consult a business lawyer or CPA for help on your taxes.
One important piece of the settings tab is your attribution window. According to Facebook, “Your attribution setting determines how Facebook measures actions that result from your ads. Facebook uses last-touch attribution model. You can set your attribution window, or the period of time for which you want to count actions people take after clicking or viewing your ads, which will affect the results you see for your ads.”
Basically, this is just for your own tracking purposes.By default, Facebook sets this to 28 days after someone clicks an ad, or 1 day after someone sees the ad in their feed (called the “view window”).
And that’s it for navigating the ads manager! Next up, we’ll talk about the different Facebook ad objectives and which you should use.
Understanding (And Choosing) Facebook Ad Objectives
Facebook ad objectives tell Facebook what you want people to do when they see your ad.
There are three ‘categories’ of objectives:
- Awareness
- Consideration
- Conversion
Under those three categories, you have multiple distinct objectives.
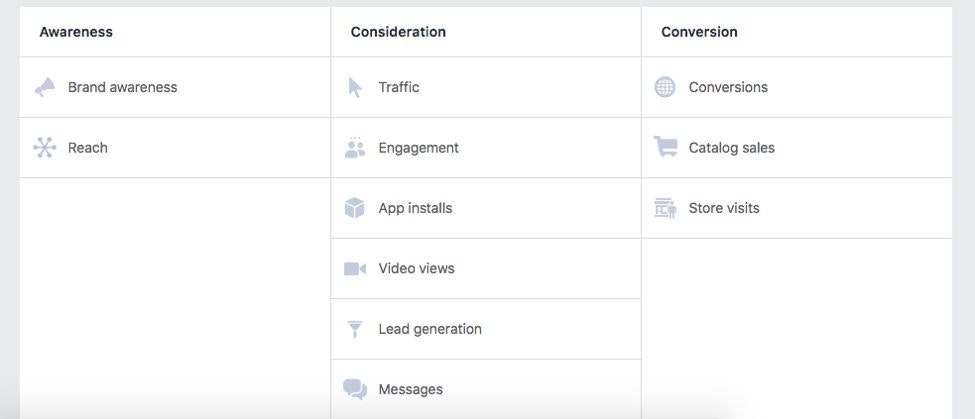
Let’s quickly break them down so you have a better understanding of what to choose.
Awareness Objectives
There are two campaign objectives under the ‘awareness’ category:
1. Brand Awareness
Brand awareness is strictly used to increase your audience’s awareness of your brand. Only use this objective if you just want to get your brand in front of people and don’t necessarily care about an immediate ROI.
You’ll only be charged per impression and Facebook calculates the bidding automatically – you can’t change your bid. It’s also one of the least expensive ad types.
However, I personally wouldn’t use this objective because it’s so difficult to calculate the ROI.
2. Reach
Reach is simply designed to show your ad to as many people as possible. Like brand awareness, you are only charged per impression, not per click.
This objective is best if you have a small audience and want to reach as many people in that audience as possible. Otherwise, you’ll just be showing your ad to lots of people who may or may not be potential customers.
Consideration Objectives
The ‘consideration’ category has a whopping six objective types:
1. Traffic
The traffic objective is designed to send people straight to your website, without completing a specific action like entering the contact details or making a purchase.
This objective is best used when sending traffic to content on your website, like blog posts or articles. It’s a key part of a solid content marketing strategy.
2. Engagement
An engagement ad is used strictly to get more engagement, such as likes, comments, or shares, on your post.
These ad types are usually used when a post performs well organically and you want to increase their reach and engagement. This ensures the lowest cost and highest return.
The only time we’d use an ad like this is if we posted something we really want people to engage with, such as a quiz, survey, or giveaway contest.
3. App Installs
App install objective is exactly what it sounds like – a way to get more installs of your app.
For this objective, you pay per install of your app. So if you have an app, this is obviously the best choice.
4. Video Views
Video views are also exactly what they sound like – a way to get more views of your Facebook video. What’s cool about this objective is that you can choose to be charged per impression OR per 10 second video view.
Native Facebook video is one of the highest engaged types of posts, so if you have the skills to create a video ad or a video guide with a call to action, this can be a lucrative objective type.
5. Lead Generation
Lead generation campaigns are the second most-popular campaign type next to conversion campaigns. This is because these campaigns bring you direct leads for your business, which can be calculated in an ROI equation, unlike engagements or impressions.
What’s interesting about lead generation campaigns is that users can populate the information fields with the click of a button using their Facebook details. This is one of the biggest reasons Facebook advertising work so well – you can build a list without sending people to a landing page outside of Facebook.
6. Messages
The messages objective prompts users to have a conversation with you in Facebook messenger, to complete purchases, answer questions, or get support.
The best use of this ad type is to convert people who may be on the fence about your product. For example, you can run a remarketing ad to people who abandoned cart on your store to get them to come back and seal the deal.
Conversion Objectives
There are three objectives in the ‘conversion’ category:
1. Conversions
Conversion objectives are used when you want people to perform a certain action, such as submit their contact details or buy a product.
This is the most common type of Facebook ad, as it is directly tied in with your ROI. You can use conversion ads to make sales or capture leads on a separate landing page.
2. Catalog sales
The catalog sales objective is specific to eCommerce websites that have uploaded their product catalog to Facebook. It allows you to remarket to anyone who visited your catalog but didn’t buy.
You can upload a product catalog by going to www.facebook.com/products/catalogs/new and following the instructions.
3. Store Visits
The store visits campaign objective is for people who have multiple physical businesses. You can advertise to people who have physically visited one of your stores.
The Takeaway: Which Objective Should You Use?
You should choose your objective based on your campaign goals. Someone who simply wants to improve brand awareness will use a different objective than someone who is very ROI-focused.
The two objectives you’ll most likely want to use are lead generation or conversion-focused campaigns. Again, this is because they are the only objectives directly tied in with ROI.
The only exception would be if you have a Facebook catalog, in which case you may want to use the catalog sales objective, or if you have physical locations, in which case you may want to use the store visits objective.
Next, let’s move on to the types of Facebook ad formats, and which ones you should use in your ads!
Types of Facebook Ad Formats (And Which To Use)
Facebook ad formats are the kinds of ads you can create. Like objectives, we can break down the ad formats into multiple ‘categories’ based on your ad goals. (These categories aren’t set by Facebook, we’re just putting them into our own categories based on how we’ve used them and seen them used.)
Here are the Facebook ad format categories:
- Traffic & Leads
- Sales & Product or Service Leads
- Likes & Engagement
- Mobile & Desktop App Installs
- Physical Visits to Your Store or Event
First, we’ll break them down so you know what each one does, then we’ll tell you the best one to use for ROI purposes.
Traffic & Leads Formats
If you want to drive traffic to your website or capture general leads like email subscribers (not sales leads), there are three ad formats you can use:
1. Link Click Ads
Placements supported by Facebook: Desktop Newsfeed, Right Column, Mobile Newsfeed, Audience Network, Instagram
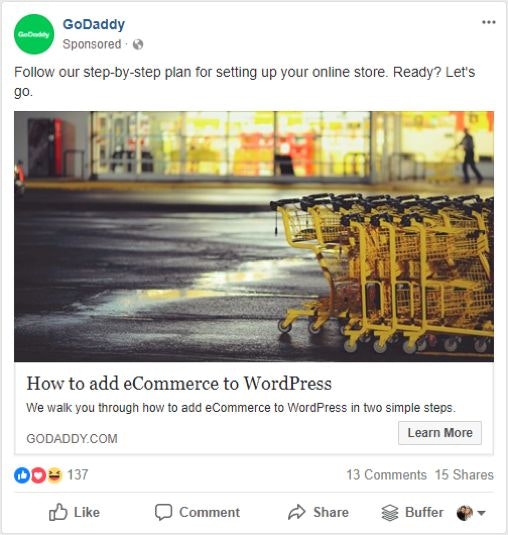
Link click ads like the one above are designed to drive clicks to your website. They are the staple of Facebook ads, and one you’re probably familiar with.
This ad format is best used to drive traffic to a blog post or landing page. The example above takes me to an article that teaches you how to add eCommerce functionality to WordPress using GoDaddy – so it promotes their service without directly asking for the sale.
Specs:
- Recommended image size: 1,200 x 628 pixels
- Ad copy text: 90 characters
- Headline: 25 characters
- Link Description: 30 characters
2. Video Ads
Placements supported by Facebook: Desktop Newsfeed, Audience Network, Right Column, Instagram, Mobile Newsfeed
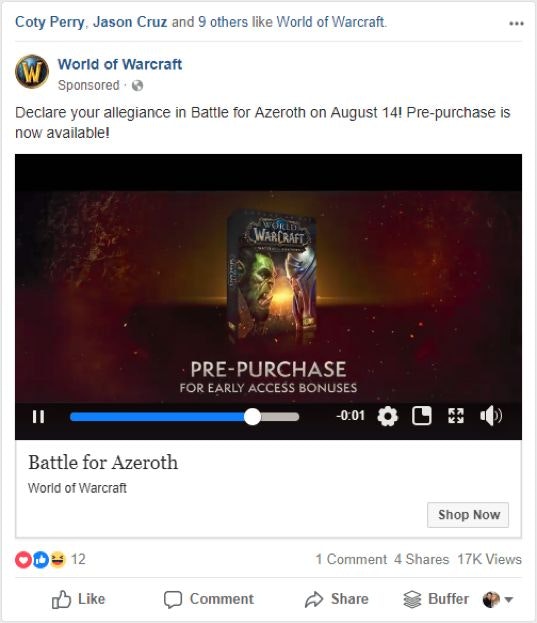
We already mentioned how Facebook video posts are one of the strongest performing posts you can create in terms of user engagement. Video ads are just like link click ads, but instead you’re paying to have people watch your video.
This format is a great way to show off how your product works, then drive sales from the video. Bonus points if you can make the video funny!
Specs:
- Ad copy text: 90 characters
- Aspect ratios supported: 16:9 to 9:16
- File size: up to 4 GB max
- Continuous looping available
- Video can be as long as 120 min., but optimal time is 30-90 seconds
3. Boosted Page Posts
Placements supported by Faceebook: Mobile Newsfeed, Desktop Newsfeed, Audience Network, Instagram
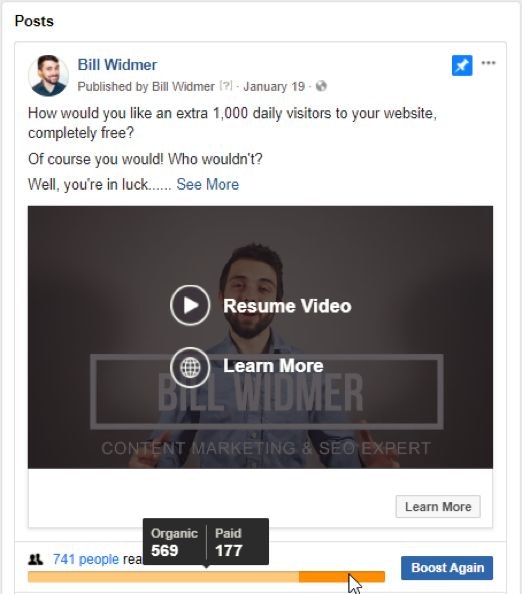
Whenever you post to your Facebook page, you have the option to ‘Boost’ that post. This shows your post to more people, in order to get more engagement and clicks.
Once you click ‘Boost post’ you can set up an audience to target with your post. Many Facebook marketers use this feature to boost their post to people who have liked their Facebook page, as this helps your followers see it.
Pro tip: Only boost posts that have already showed some good initial engagement. If you try to boost a post that no one wants to engage with, you’re only wasting money. Facebook’s algorithm makes it cheaper and more lucrative to boost naturally well-performing posts.
Specs:
- Recommended image size: 1,200 x 628 pixels
- Ad copy text: unlimited
- Headline: 25 characters
- Link Description: 30 characters
Sales & Product or Service Leads Formats
Next up, we have the ad formats meant to directly increase your sales or sales leads. There are five formats that fall under this category:
1. Multi-Product (Carousel Ads)
Placements supported by Facebook: Mobile Newsfeed, Desktop Newsfeed, Audience Network, Instagram
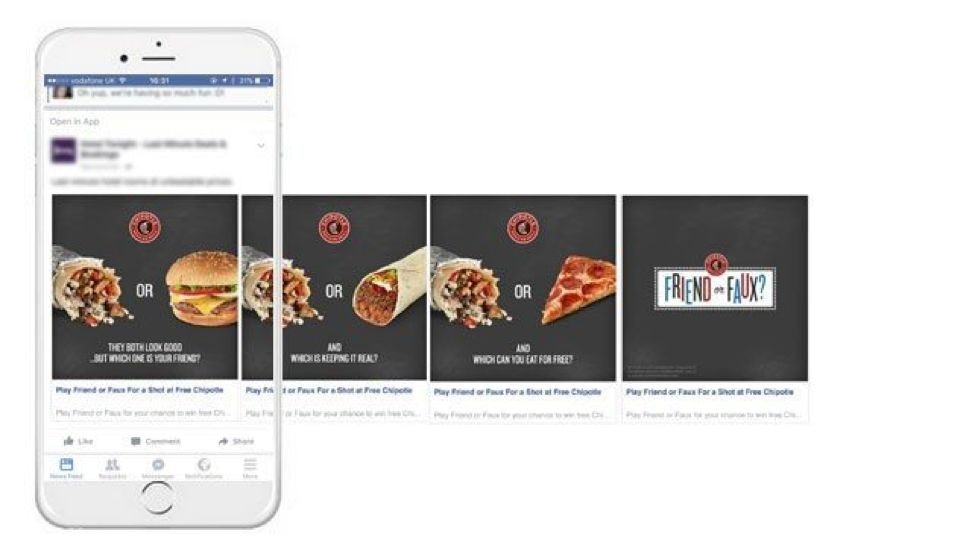
A carousel ad allows you to advertise up to 10 images in a swipe-able string from left to right. You can also display videos, headlines and links, or calls to action in each box.
The two main uses for a multi-product ad are eCommerce stores looking to promote multiple products, or marketers who want to promote different posts or offers to see which one converts best. From there, you can run solo ads for the highest performers.
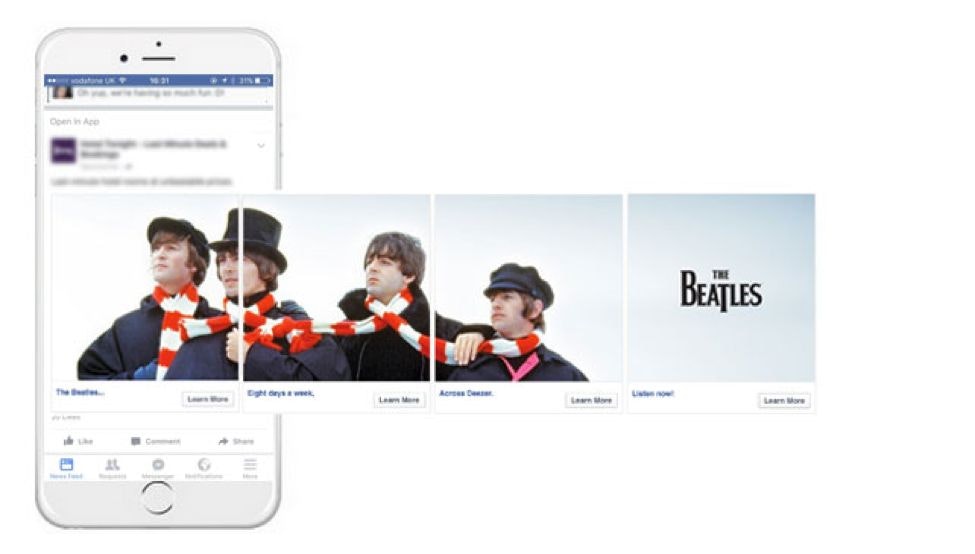
Pro tip: You can also have some fun with these ads with multiple images that form one big image, enticing people to keep scrolling out of curiosity. Like this one for The Beatles, for example:
Specs:
- Recommended image size: 1080 x 1080 or 600 x 600 pixels
- Ad copy text: 90 characters
- Headline: 25 characters
- Link Description: 30 characters
2. Dynamic Product Ads (DPA)
Placements supported by Facebook: Mobile Newsfeed, Desktop Newsfeed, Right Column, Instagram, Audience Network
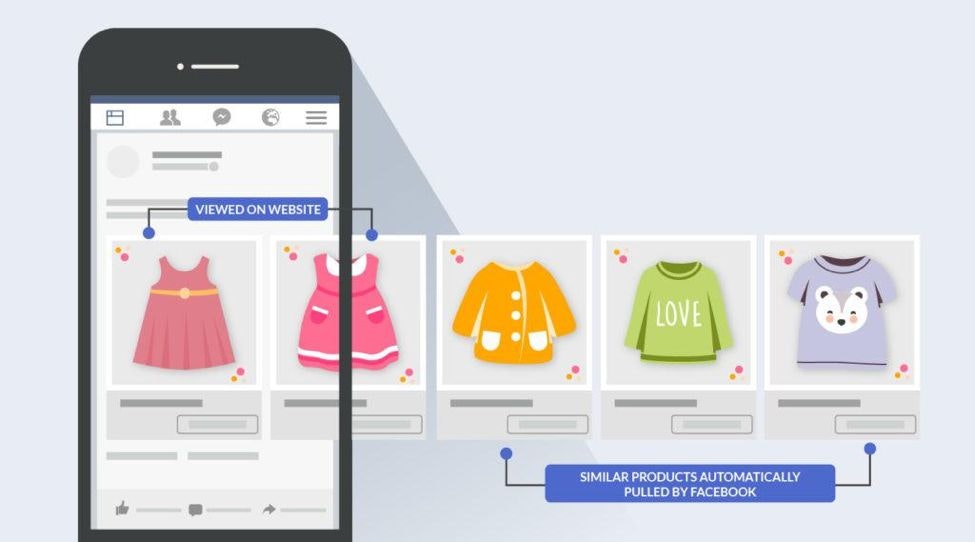
Dynamic product ads can be carousel ads or single product ads. What makes them unique is that they’re like remarketing ads, but better.
As you can see in the image above, you can combine them with customer data and carousel ads to show visitors items they viewed, plus additional items that are similar to those they viewed. This increases conversions and gets previous visitors to come back!
Note: In order for DPAs to work, you must have the Facebook pixel installed, as well as your product catalog uploaded to the Facebook advertising platform.
Specs:
- Recommended image size: 1,200 x 628 pixels or 600 x 600 pixels
- Ad copy text: 90 characters
- Headline: 25 characters
- Link Description: 30 characters
3. Facebook Lead Ads
Placements supported by Facebook: Desktop Newsfeed, Audience Network,Mobile Newsfeed, Instagram
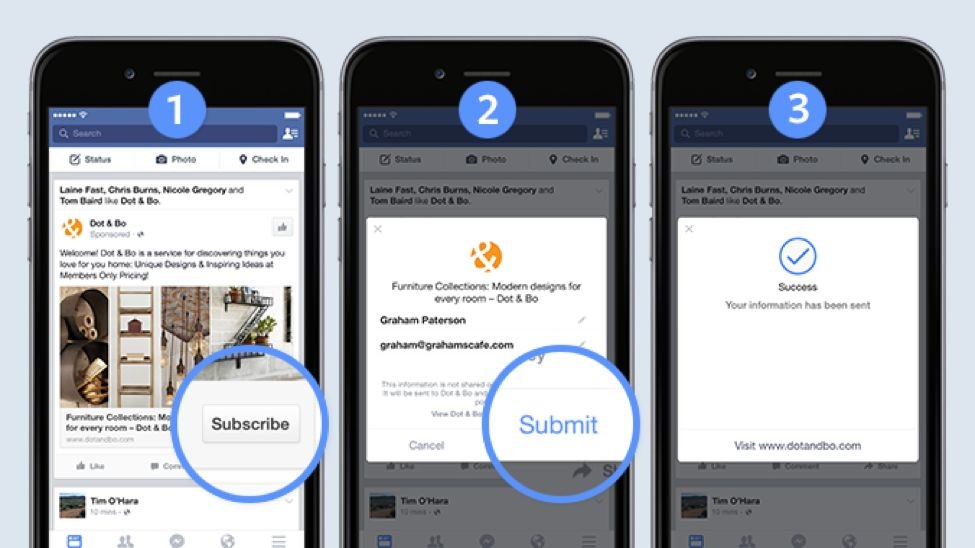
Lead ads, just like the ‘lead’ objective, are used to capture information from Facebook users without them needing to visit an external landing page.
This is a great way to get potential customer’s email addresses so you can send them lead nurturing campaigns.
Once a customer signs up, their information is stored in your ads account. From there, you can export it to a spreadsheet and import it to your email marketing platform.
There are also tools that automate this process, such as AdEspresso. (I’ll reveal more Facebook marketing tools in Chapter 6.)
Specs:
- Recommended image size: 1,200 x 628 pixels
- Ad copy text: 90 characters
- Headline: 25 characters
- Link Description: 30 characters
- Context card can be in paragraph form (no character limit) or 5 bullet point form (80 characters per bullet)
- Context card headline: 60 characters
- Context card button: 30 characters
- Privacy Policy and website URL links are required
4. Canvas Ads
Placements supported by Facebook: Mobile Newsfeed
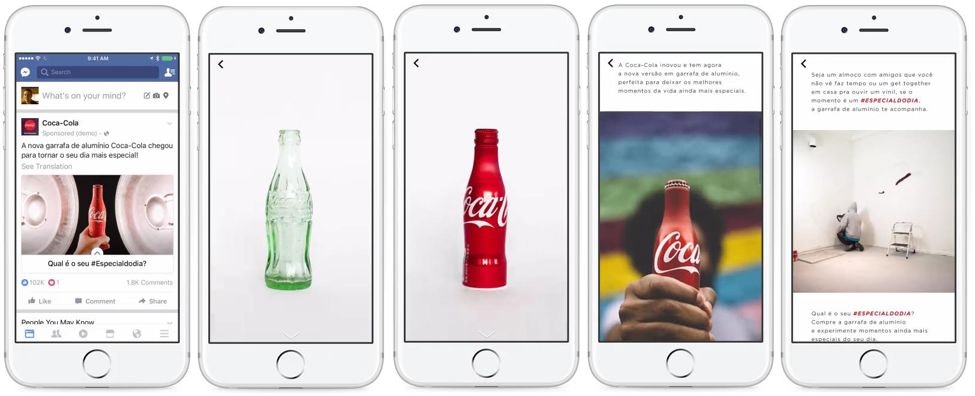
Canvas ads are unique in that they are an interactive ad. Users can swipe through a carousel of images (like a carousel ad), tilt the image in different directions to see it from different angles, and zoom in or out with their fingertips.
They’re currently only available on mobile because it’s a little difficult to tilt around your desktop screen!
Fun fact: Canvas ads load 10 times faster than standard mobile web applications.
Specs:
- Recommended image size: 1,200 x 628 pixels
- Ad copy text: 90 characters
- Headline: 45 characters
- Canvas has the following possible components:
- Header including logo
- Image (full-screen)
- Text block
- Offsite links’ button
- Carousel image
- Video (auto-play)
- Full-screen tilt-to-pan image
- Product set
5. Collection Ads
Placements supported by Facebook: Mobile Newsfeed
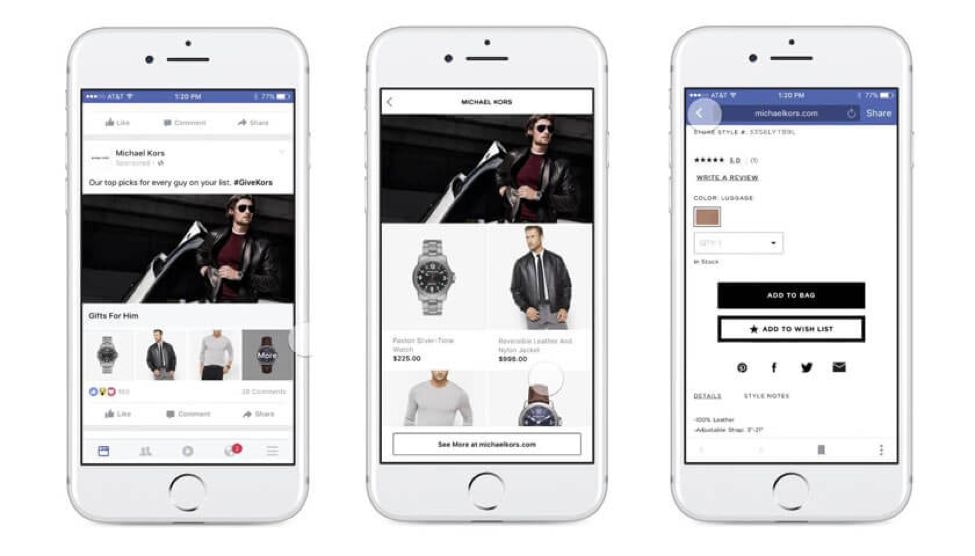
A collection ad lets you display a collection of products. You can showcase one featured image, with multiple images underneath that users can scroll through and click on.
You can also feature a video instead of an image, with the products from the video in the image boxes below.
Specs:
- Image Size: 1,200 x 628 pixels recommended
- Image Ratio: 1.9:1
- Your image may not include more than 20% text. Check how much text is on your image.
- Headline: 25 characters recommended
Likes & Engagement Ad Formats
Next up, we have four Facebook advertising formats designed to get more ‘likes’ on your Facebook page or engagement on your posts.
- Page Like Ads
- Page Post Ads
- Page Post Video Ads
- Page Post Text
Let’s dive in!
1. Page Like Ads
Placements supported by Facebook: Right Column, Desktop Newsfeed, Mobile Newsfeed
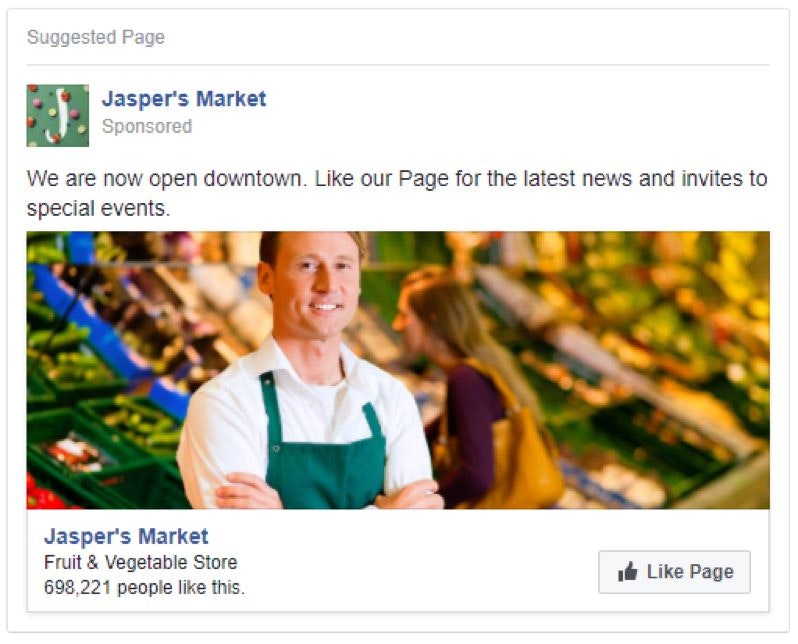
Page like ads are used to get more ‘likes’ on your Facebook page.
If used without care, they can easily burn a hole in your wallet. But if you use them strategically, like Jon Loomer did in the example above, they can be a great way to get your website visitors to also like your Facebook page.
Since these people already know who you are (since they’ve visited your site), they are more likely to ‘like’ your page and engage with your content thereafter.
2. Page Post Photo Ads
Placements supported by Facebook: Desktop Newsfeed, Right Column, Mobile Newsfeed
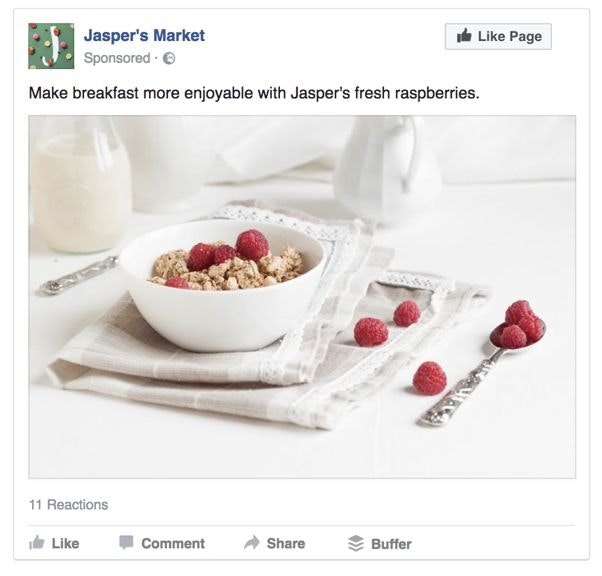
Like a page like ad, a page photo ad’s goal is to get more likes and engagement on your page. However, with the photo ad, the call to action is less prevalent.
We don’t recommend using this Facebook advertising format.
3. Page Post Video Ads
Placements supported by Facebook: Desktop Newsfeed, Right Column, Mobile Newsfeed
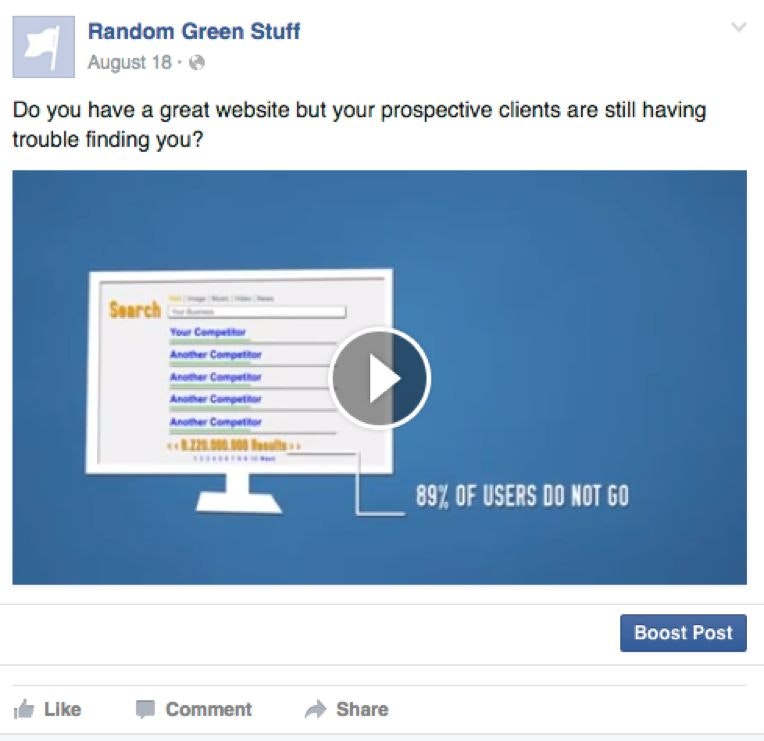
Finally, page post video ads let you get more page likes through video. Again, this is difficult to monetize, but it can be a good medium if you’re exceptional at video and get your ad targeting right.
Specs:
- Ad copy text: 90 characters
- Aspect Ratios Supported: 16:9 (full landscape) to 9:16 (full portrait)
- File size: up to 4 GB max
- Video can be as long as 120 min, but most top-performing videos are 15-30 seconds
- Audio: Stereo AAC audio compression, 128kbps + preferred
4. Page Post Text
Placements supported by Facebook: Desktop Newsfeed, Right Column, Mobile Newsfeed
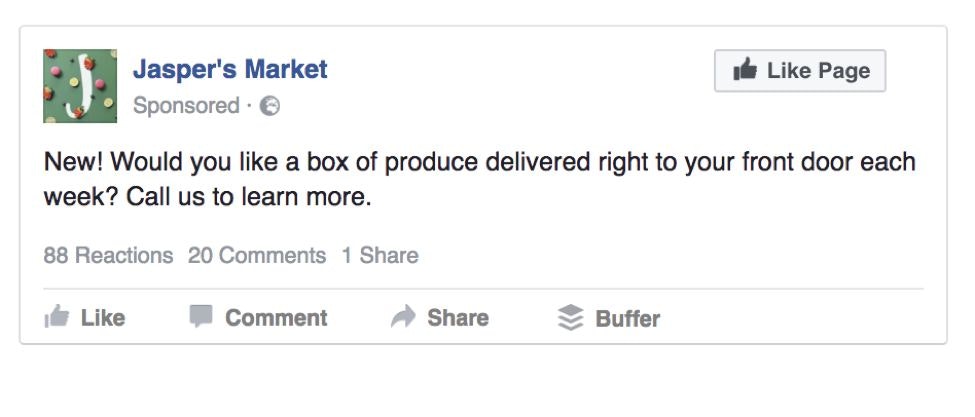
Lastly, we have a simple page post text ad. No fancy images or videos – just text and a ‘like this page’ button.
Unless you’re an insanely good copywriter, we suggest avoiding this ad format altogether.
Mobile & Desktop App Installs
If you offer a mobile app or Facebook app, these ad types are for you. There are three types total: one for Facebook-specific apps and two for mobile.
1. Mobile App Ad
Placements supported by Facebook: Mobile Newsfeed
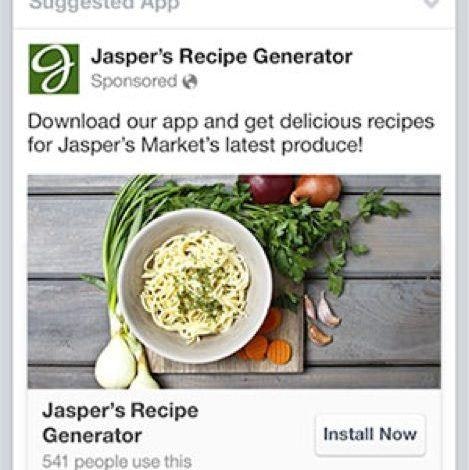
Mobile app ads are only available on the mobile newsfeed. They also have one of the highest conversion rates of all ad types, since clicking the CTA ‘Install Now’ takes the user straight to your mobile app in the app store. (Works for iOS and Android.)
You can also create ad targeting based on which platform they’re on (iOS or Android), whether they’re on a certain device (like Samsung vs. Motorola), and mobile vs. tablet.
Specs:
- Recommended image size: 1,200 x 628 pixels
- Image ratio: 1.9:1
- Ad copy text: Up to 90 characters
- Your image may not include more than 20% text.
2. Desktop App Ad
Placements supported by Facebook: Desktop Newsfeed, Right Column
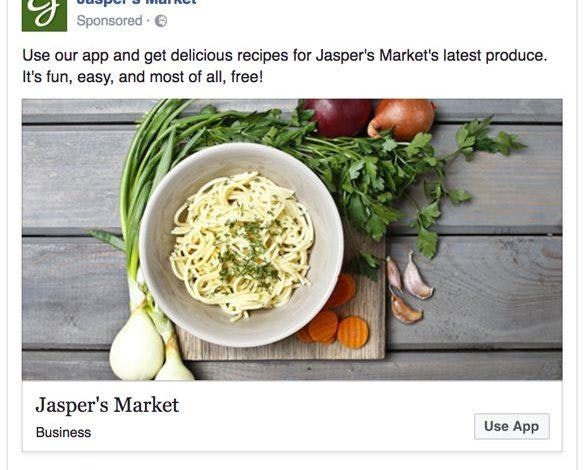
Desktop ads are only usable if you have a Facebook app. It’s also only targetable to desktop users, since Facebook apps are not usable on mobile.
Specs:
- Recommended image size: 1,200 x 628 pixels
- Image ratio: 1.9:1
- Ad copy text: Up to 90 characters
3. Instagram Mobile App Ads
Placements supported by Facebook: Instagram
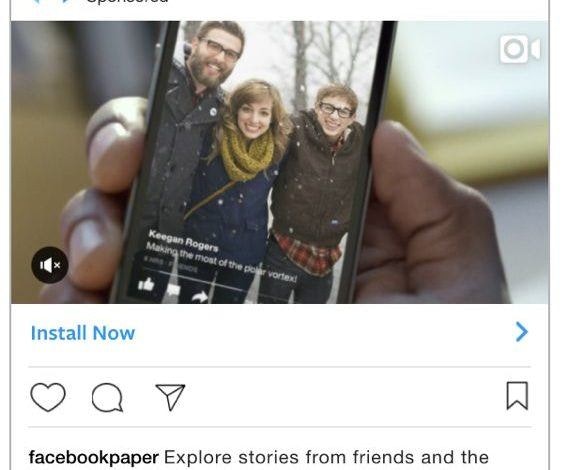
Instagram mobile app ad types are just like regular mobile app ads, but instead of showing your app on Facebook, it’s displayed on Instagram.
Since virtually all of Instagram’s users are viewing the social network on the mobile app, it makes sense to advertise a mobile app of your own here.
Specs:
- Image ratio: 1:1
- Image size: 1080 x 1080 pixels
- Minimum resolution: 600 x 315 pixels (1.91:1 landscape) / 600 x 600 pixels (1:1 square) / 600 x 750 pixels (4:5 vertical)
- Maximum resolution: 1936 x 1936 pixels
- Caption: Text only, 125 characters recommended
Physical Visits to Your Store or Event
Finally, we have Facebook ad types designed to attract people to your physical store or event. There are three types you can choose from.
1. Event Ads
Placements supported by Facebook: Desktop Newsfeed, Right Column, Mobile Newsfeed

Event ads are, you guessed it, ads that promote an event. For maximum impact, keep your event ads to the local area, city, or region of your event. (Unless you hold a major conference like Social Media Marketing world or Internet Retailing Expo, which get visitors from all over the world.)
Pro tip: You can also use this ad type to advertise to people who have visited your store or website, or create a lookalike audience using your email list. More on ad targeting in Chapter 4.
Specs:
- Recommended image size: 1920×1080 pixels
- Image ratio: 1.9:1
- Ad copy text: Up to 90 characters
- Headline: 25 characters
- Link Description: 30 characters
2. Offer Claims
Placements supported by Facebook: Desktop Newsfeed, Right Column, Mobile Newsfeed
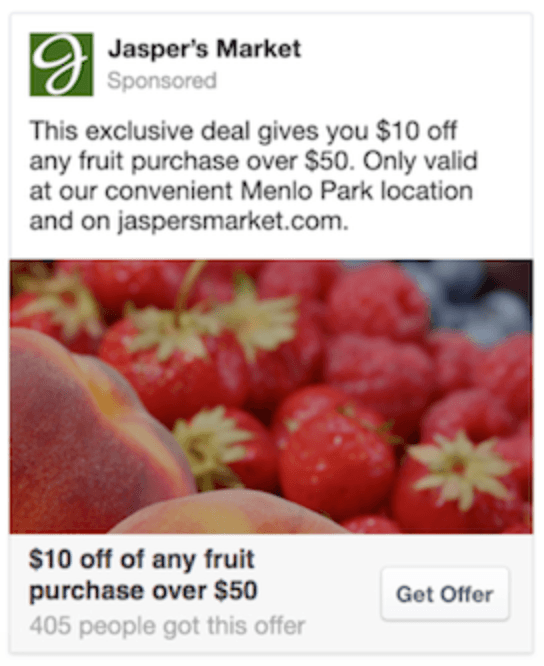
If you own a brick-and-mortar store, this ad type will be your best friend. You can offer coupons or BOGOs to people in your local area to attract foot traffic to your store.
When someone clicks ‘Get Offer’, they’ll get an email with the coupon code, which they can bring into your store and use.
Note: Your Facebook page needs at least 50 likes to run an offer ad.
Specs:
- Recommended image size: 1,200 x 628 pixels
- Image ratio: 1.9:1
- Offer title: Up to 25 characters
- Ad copy text: Up to 90 characters
3. Local Awareness Ads
Placements supported by Facebook: Desktop Newsfeed, Right Column, Mobile Newsfeed
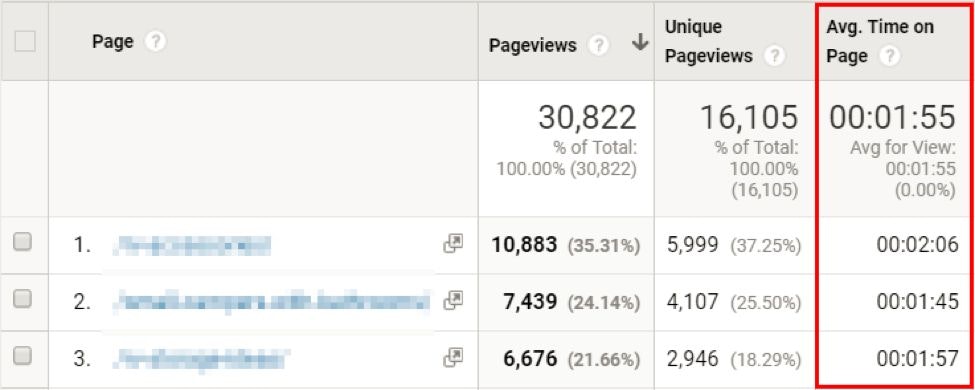
Have you ever been scrolling through Facebook while you’re out on the town, when you see an ad for a store that’s less than a mile from you?
That’s a local awareness ad. You can target people who are currently near your store to get them to drop by. You can create CTAs like ‘Call Now’ or ‘Send Message’ to get users to contact you.
Specs:
- Recommended image size: 1,200 x 628 pixels
- Image ratio: 1.9:1
- Text: 90 characters
- Headline: 25 characters
- News Feed description: 30 characters
How to Create Your First Facebook Ad
Phew – it’s finally time to create your first Facebook ad!
To start your first Facebook advertising campaign, go to the Ads Manager. From here, you’ll have to choose a marketing objective. (If you skipped the section explaining marketing objectives, go back up and read through it.)
Once you’ve chosen an objective, give your campaign a name. Remember, this is your entire ad campaign, not your individual ad. This campaign can contain multiple ad sets, which can each contain multiple ads. So name your campaign appropriately.
For example, I might name my campaign ‘T-Shirts’ to contain all the ads for my t-shirt products.
Next, you create an ad set, which is where you dictate the audience, ad placement, and budget. You’ll learn more about audience targeting in Chapter 4. For placement, either leave it automatic or choose the best placements based on what we covered in the previous section. You can also test various placements to see which perform the best (more on split testing in Chapter 5.)
As for the budget, we recommend a minimum ad spend of $100 to test a campaign. You can spend as little as $5-$10 to get a minor boost, but you won’t have enough data to make a decision at that spending level.
Pro tip: A good way to test an ad is to set a $5-$10 daily budget across 5-10 days. By that point you should have a good idea of whether the ad is working or not. Keep in mind that losing money can still be a successful ad if you factor in CLV, and your first few ads are likely to lose money anyway. Breaking even can be a good thing as well, since you’re basically getting free email leads to remarket to.
Now, before we dive into creating the actual ad, I want to discuss Facebook’s bidding system.
Maximizing Facebook’s Bidding System
Facebook’s pre-arranged settings make it so you let them automate how much you spend per click (or whatever goal you’re aiming for).
In theory, this is great – you “get you the lowest cost results, based on your optimization for ad delivery”. However, Facebook also says that they “bid more as needed to spend your budget.”

This essentially means that they will try to spend your budget as quickly as possible if you don’t set a bid cap or an average bid amount.
Note: To edit the bidding, you have to click on the ‘Advanced Settings’ button linked in blue at the bottom of the ad set page.
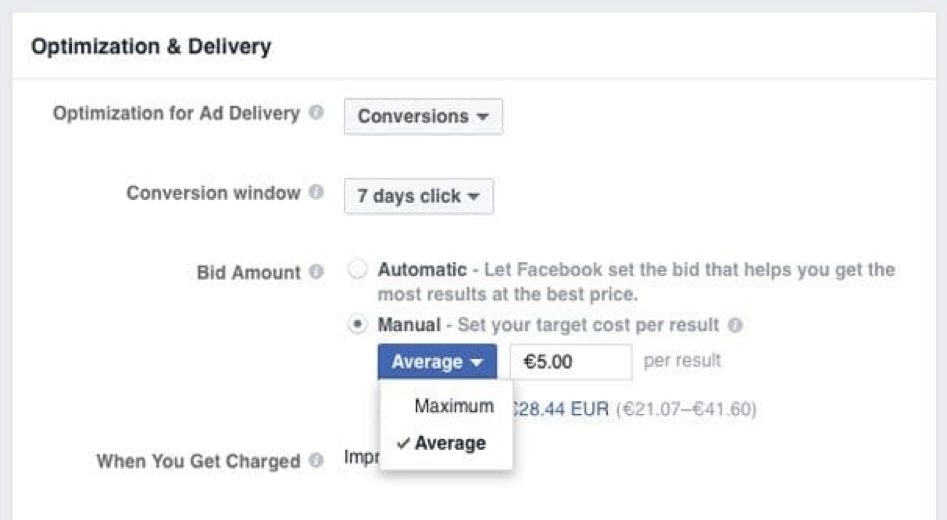
You can also set an average or maximum bid amount for certain campaign objectives.
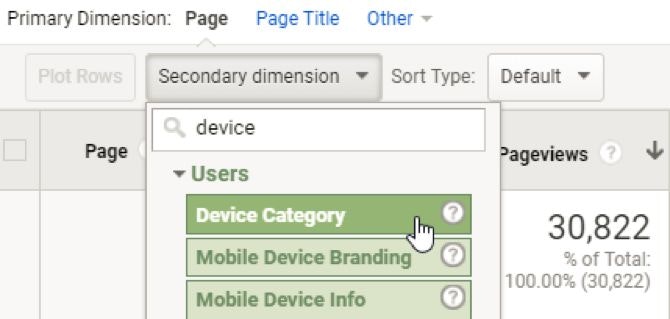
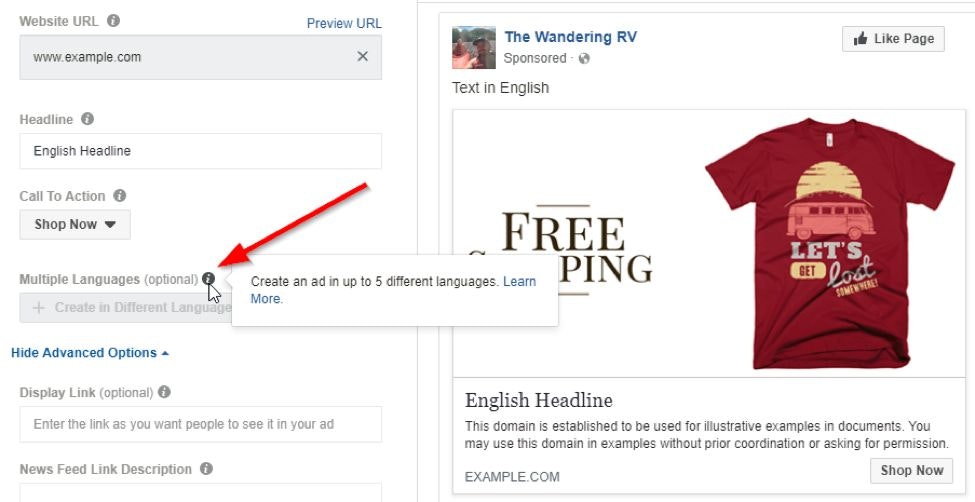
The average bid will use a strategy called pacing, which essentially paces your ad throughout the day rather than spending all the budget in the morning on low price ads. This means you may spend less on some ads and more on others to average your bid price.
Here’s a visual:
If you want to maximize profit and minimize CPA, use the ‘maximum’ bid.
If you want to maximize ad delivery and get as many conversions as possible (even if they cost a bit more), use the ‘average’ bid.
That leaves the question – how much should you set as the average or maximum bid amount?
The answer depends entirely on how much you can spend while still making a profit (at least in the long run). This is why it’s crucial to know your CPA and CLV (If you don’t have these yet, go back to Chapter 1 and calculate them).
And that’s it for bidding! Now, let’s set up the actual ad.
Creating the ad
At this point you’ve created an ad campaign, targeted an audience at the ad set level, set up a budget, and set a maximum or average bid amount. Now it’s time to actually create the ad!
Name your ad and choose a page to represent it. You can also add an Instagram account.
After that, choose the ad format you’d like to display it as. If you’re not sure what format to use, go back to the section above on the different ad format types and select the one that makes the most sense for your ad.
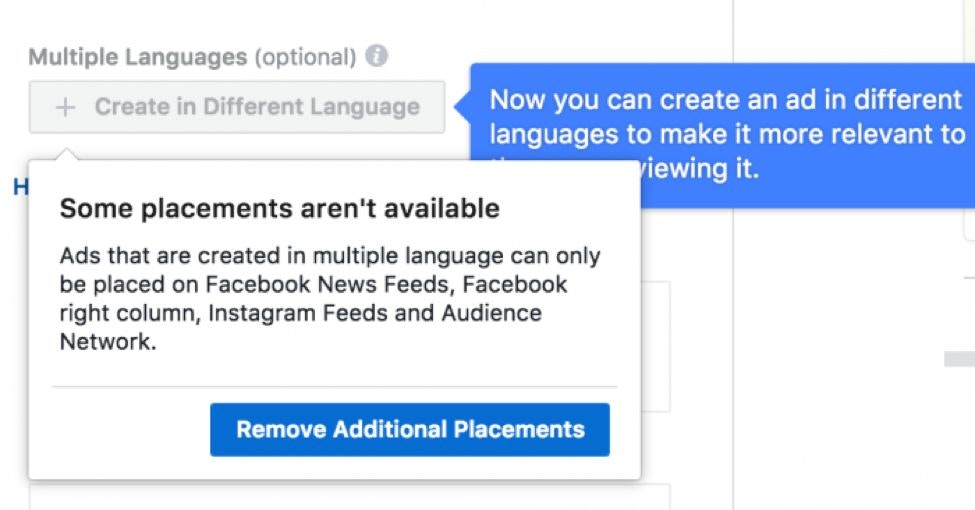
Finally, add your image or video, copy, website URL and headline.
Pro tip: If you don’t yet have an image, you can use Canva to create Facebook advertising images. They have free Facebook ad templates to easily create ad images. Keep in mind that your ad shouldn’t contain more than 20% text or your reach may be limited.
For more help creating awesome images, we have Nadya Khoja, the Director of Marketing at Venngage:

After running this test for a couple of weeks we were able to identify which images resulted in the lowest cost per clicks. The main elements of some of the best performing images were:
- That they had a darker background
- They had a clear call to action
- They included a photograph of a location
- They included charts to suggest new research
- And also the ones with sans serif fonts performed better.”
Note: In most cases, we’ve found that what determines your ad’s success or failure is not the ad itself, but the audience targeting and the offer. If you’re not seeing results, tweak one of these first. More on optimizing your ads in Chapter 5.
If you go under the advanced settings, you can also change the display link (to show a URL without the UTM tracking code so it’s less intimidating), add an additional link description in the news feed, create URL parameters to track your campaigns in Google Analytics, and turn on pixel Conversion Tracking.
And that’s all there is to it! You now have a Facebook ad you can turn on and watch the money roll in (hopefully).


Keeping Your Facebook Ad Campaigns Organized
Once you start creating multiple campaigns and ad sets, things can get out of hand quickly. You should instill a few best practices to keep your ad campaigns organized and easy to navigate.
Organizing at the Campaign Level
First of all, you should have one campaign per objective. For example, you could have a traffic objective to drive traffic to your blog content. It would look like this:
In this case, I would simply name the campaign ‘Blog Traffic’. That way I can see reporting on all the different blog posts and audiences within a single campaign.
If you have products you’re advertising to, you could create one campaign with the conversion object and title it ‘Products’. Then, you could set different products under difference ad sets (audiences) and see the performance of all your products at a glance.
If you’re running evergreen promotions that you’ll continue to advertise, it’s also a good idea to create separate campaigns for each promotion. Like this:
Organizing at the Ad Set Level
Following the campaign level you have your individual ad sets. One of the best ways to organize ad sets is by audience targeting.
Some ways you can break down targeting include:
- Remarketing – website users
- Lookalikes of website users
- Custom List uploads
- Lookalikes of custom list uploads
- People who liked your page
- Lookalikes of people who liked your page
- Manually targeted audiences (interest/behaviors)
- Variation 1 – Broad
- Variation 2 – Narrow
Then you can target further down the funnel:
- Conversions
- Lookalikes of conversions
And some advertisers like organizing their ad sets by:
- Geographic location
- Language
- Placement (i.e. Instagram, desktop, mobile)
So for instance,
So for instance, one ad set can be set up targeting remarketing to site users only, another for lookalikes of these users, and likewise. This helps you decipher which audience is performing best for you (since most ads succeed or fail by the audience or the offer alone).
Name the ad sets to reflect this. I would literally name my ad sets ‘Remarketing to Website Visitors’, ‘Lookalike of Website Visitors’, etc.
Pro tip: If you didn’t already know, you can save any audience you create by clicking the ‘Save This Audience’ button and giving it a name.
Organizing at the Ad Level
Finally, we have our individual ads.
This is the easiest part. Just name your ads based on the offer or product you’re advertising. For example, if you’re running ads to blog posts, put the name of the post. If you’re running ads to a certain product, put the name of the product. Easy!
And we’ve made it through Chapter 3! If you’ve been following along, give yourself a pat on the back. This was a lot of information to dig through.
By now you’ve created and run your very first Facebook ad. Next up, it’s time to tweak your audience targeting to ensure you’re only showing your ads to the people who are likely to convert.
